HOW TO CREATE AND DESIGN COMMON BOOK COVER IMAGES: PART 1. PLANETS, STARS AND OTHER ASTRONOMICAL BODIES

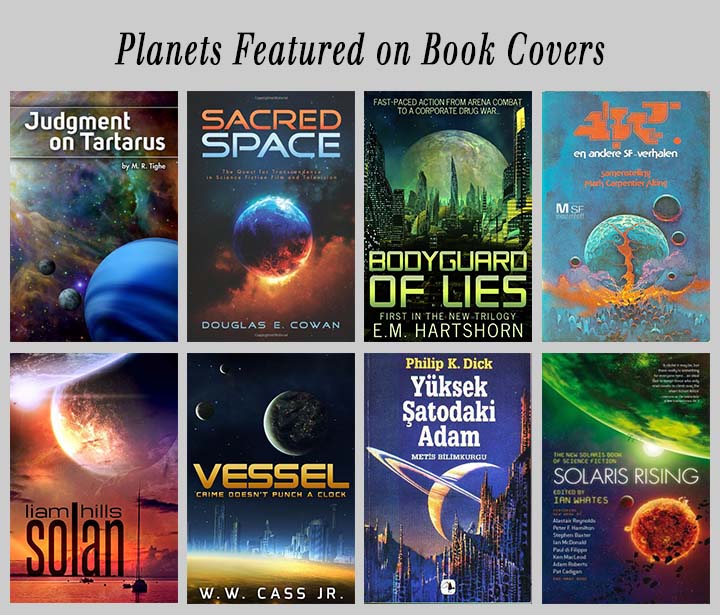
Welcome to my articles on HOW TO CREATE AND DESIGN COMMON BOOK COVER IMAGES. In this article we will concentrate on astronomical bodies. Of these, planets are probably the most prominent. They come in such a variety of appearances, often with striking colours. It is important to be able to create lifelike planets. Luckily with software like photoshop this is easily within reach. If you go through the tutorial videos advised in this article (I will reference videos I have been through; I could do my own video of them, but why reinvent the wheel; it is wise to rely on original videos) you should be able to create planet images far better than those presented in books of previous decades. Here are 8 book covers that feature a planet:
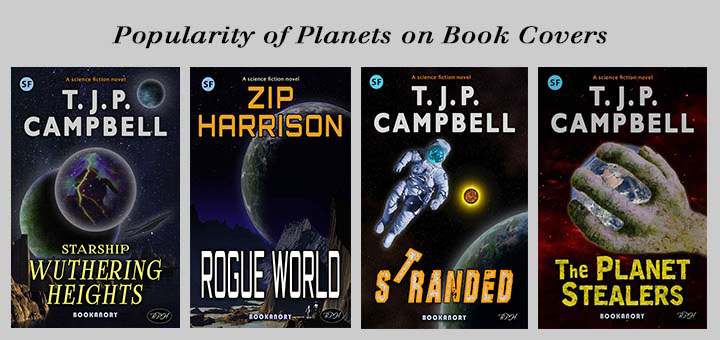
Below I show an illustration of four book covers that I created that feature some planets (as shown in an earlier article):
The YouTube videos I will recommend helped me create the planets (and associated astronomical objects). Here are the videos with any added hints:
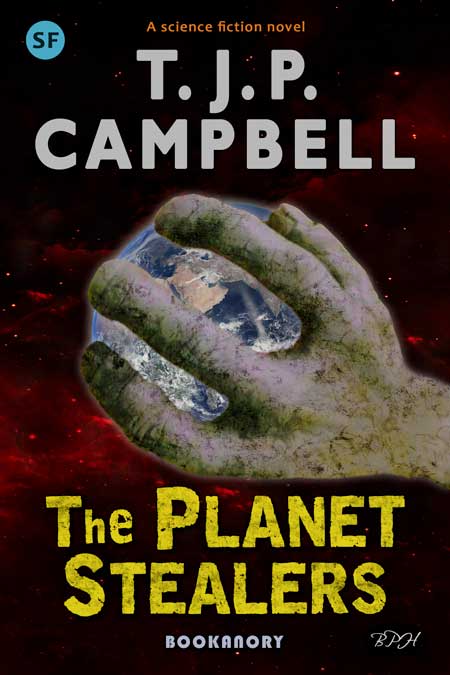
First, I would like to get the 3-D out of the way. I used the following video tutorial to help me create my planet Earth in The Planet Stealers book cover shown above.
Here is a larger image to show you how I used it on The Planet Stealers:
Now, an important way to make realistic planets is to blend satellite landscape images. My illustrations and the following two videos will give you plenty of examples to understand this method and its usefulness. By combining what I learned in the following two videos with the 3-D video above, I created all the planet work to follow. Here are the two videos:
The basic starting point is to select the layers you wish to blend (three of four adjacent images at a time), then go to Edit in photoshop, then down to Auto-Blend Layers, and then select Panorama Blend.
Start with chosen pieces of satellite landscape or grunge texture, which can be randomly rotated and warped a little:
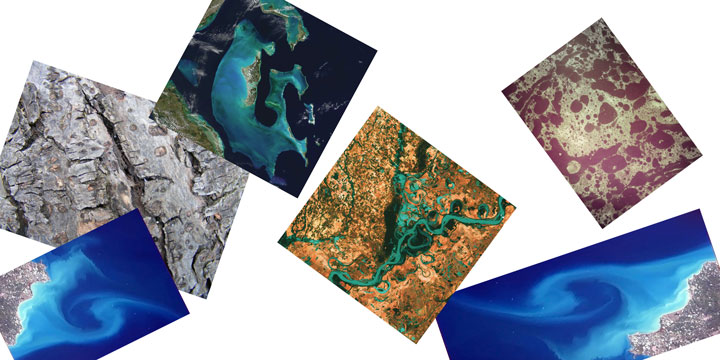
Next, select the layers you wish to blend (three of four adjacent images at a time), then go to Edit on the menu bar in photoshop, then navigate down to Auto-Blend Layers, and then select Panorama Blend. Here is the result I obtained using 5 unique images (I used one twice as a sea fill-in):
Blended layers with panorama function:
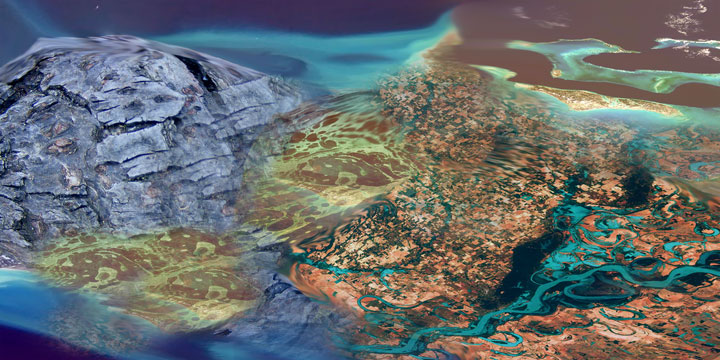
I then used the 3-D mode in photoshop as in the first video I showed at the beginning of the article to create a globe from the blended texture. Below I show the planet with its texture map darkened in the background:

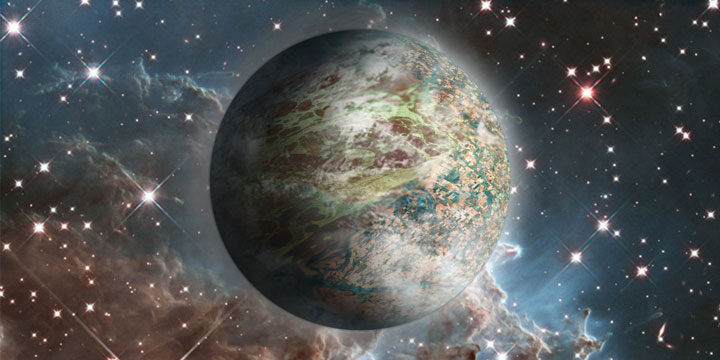
Here is the planet with some shadowing, atmosphere and glow added:
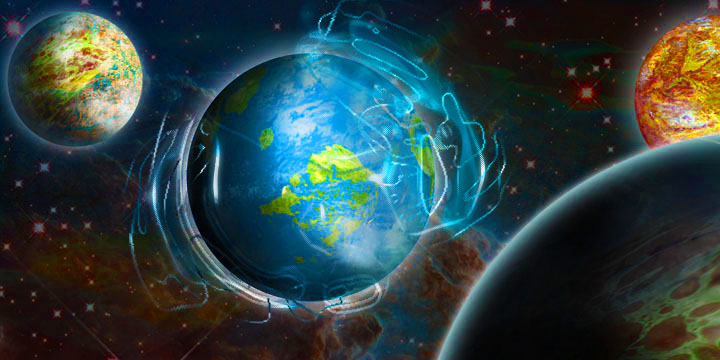
Why not take advantage of the planet’s texture map to produce another 3-D object? Below is an image using the planet’s 2-D texture map to create a 3-D ring (possibly it is an artifact using an on-board gravity system to make it a space wheel where people might live on the surface of the ring):
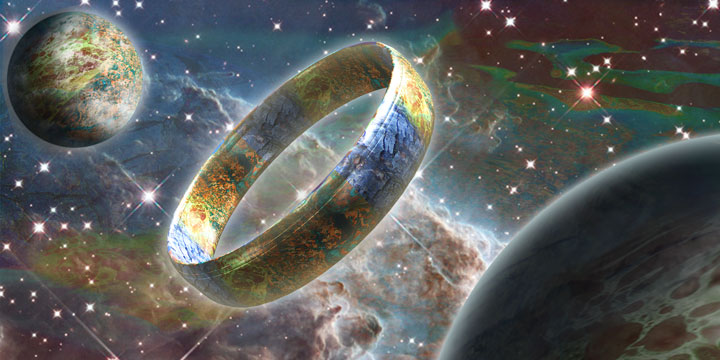
Adding another three planets. The central planet I made by manipulating an Earth texture map to create an Earth-like planet (rather than auto blending layers with the panorama filter.

I did not use a large image canvas for my Earth-like planet, and so I would not use the above image on a professional book cover. But if I need a similar image, I will simply make my central Earth-like image of greater resolution. Anyway, next, below I show an effect added to the central planet to make an image that could act as the main background image on a book cover.
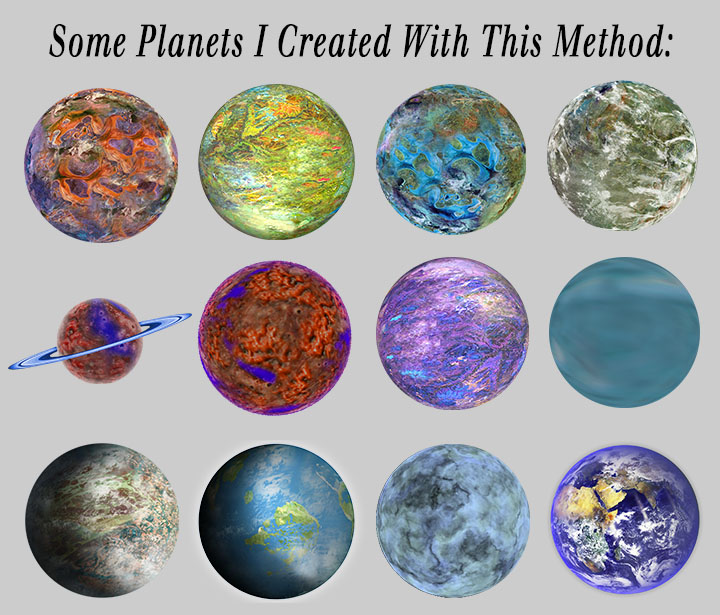
Finally, here is a collection of planets I made using the videos above during the writing of this article:
It is important to create your own planets because it ensures your overall book cover image will be original. None of the images I designed above have ever appeared anywhere before. It’s also good fun to create your own worlds, but don’t get too hooked on it. Always learn the techniques and soak in the graphic designs you view and create, then move on and you’ll be more prepared to be able to make a requested book cover. Make book covers, not just planets!
The next video I would advise you to go through is really good, as it will help you create not just the planets, but the surrounding astronomical objects.
Sci-Fi Space Scene Photoshop Tutorial:
The reason I place so much emphasis on this video is because although you could use NASA-type images of galaxies and so forth, if you create your stars and nebulae etc yourself using basic photoshop functions, you’ll have everything in the same working colour space. Everything will look uniform. It’s actually better to create your own star-field. You can easily make changes and get a much better result as you will have overall control of every pixel.
To finish off this article I would advise you to look at the following YouTube videos:
Spectacular Night Scene:
Moon or Planet into a Photo:
Episode 12_ Creating a planet in Photoshop:
How to make a Planet with Rings (HD) Photoshop Tutorial:
Inverted World – Speed art ( #Photoshop CS6 ) _ CreativeStation:
Outer Space Planet Scene (HD) Photoshop Tutorial:
Photoshop How to Make a Planet EXPLODE from its Core:
Photoshop_ Create Dawn on a Planetary Horizon in Deep Space:
Photoshop_ How to Create a Cinematic Stargate in Deep Space:
Photoshop_ How to Make a Frozen, Ice Planet:
Photoshop_ How to Make a NEBULA and Celestial Sphere in Deep Space:
Photoshop_ How to Make Giant Gaseous Planets like JUPITER from Scratch:
Photoshop_ How to make the SUN:
Photoshop_ Make Spirals of Light in Deep Space:
Always try a few videos when you look an idea up on YouTube. Some videos are way better than others. Also, remember to learn basic photoshop techniques from sites like Blue Lightning and Phlearn (these two video makers are excellent for learning the foundations off. The Phlearn guy, Aaron Mace, tends to fully explain why he is using his chosen photoshop functions for the video; whereas, Marty Geller of Blue Lightning just gives you the method and settings with no messing about. Try to understand what the photoshop settings actually do. Then you can better use them for your own designs. And in case I never do articles on certain photoshop techniques, make sure you can add smoke, mist and fire properly, cut out objects (hair is difficult to remove with just basic eraser cropping), creating perfect patterns (this will stop unsightly joins on your planets when folded into 3-D globes). And a big one is: make sure you can do colour matching of composited objects that came from different images.
That concludes this article on planets, stars, nebulae etc. Next, in PART 2, I will discuss characters that often appear on sci-fi and dystopian book covers.